Tools:
Before starting building a certain number of basic tools are needed these are pretty normal DIY tools that most handy people will already have.
- Electric Jig Saw: This is probably the most important item for cutting the panels. Get a good one preferably with adjustable pendulum action and robust construction. I also used a cheap panel saw for ripping the panels down to smaller sizes.
- Wood plane, spoke-shave and files: I found these useful for final shaping of the panels after cutting with the jig-saw. An old fashioned spoke-shave is very useful for trimming small arcs.
- Measuring: A 5 metre tape is useful as well as a long straight edge for marking out. A piece of bendy plastic curtain rail makes striking the curves an easier task when marking from the plans.
- Benches: I have a trusty old “Black and Decker” “Workmate”. As well as acting as a small bench, the clamping action of the top is ideal for holding the panels together whilst shaping them up. To make a building platform, I used the 2 sections of an extending aluminium ladder laid across 2 trestles and covered with 1/2 inch plywood panels. This was ideal to use in my garage to keep everything off the concrete floor and save my back from too much bending!
- Electric drill: Used for drilling the small holes to take the stitching wires and any other holes needed. This is a matter of personal preference, I originally used on old 3/8 chuck Black and Decker mains model, which has now been replaced with a Makita 18 volt battery drill with a spare battery. I thoroughly recommend a drill of this type and has now become my drill of choice for most jobs.
- Spirit level: I like to line and level everything up using my trusty 3 foot long spirit level!
- Clamps: I found plenty of “G” clamps are useful in various sizes from small to large, some of the many uses are: holding pieces together for shaping, holding temporary jigs in place and holding sections down whilst glue sets.
- Sander: The plywood needs a good smoothing before painting, there seems an awful lot of wood to sand and a small orbital electric sander makes the task much easier and quicker.
Materials:
- Marine Plywood or Exterior Grade? I pondered over this problem and looked at a number of different grades. In the end, I chose Far Eastern Exterior Grade Plywood 3.6mm thick. I was careful to examine the sheets to ensure that the panels were of good finish and free form voids in the internal layers. The life of this material will be sufficient for the envisaged life of the boat so I couldn’t justify treble the price for marine plywood.
- The various softwood gunwales and runners seemed to be non-standard size sections so my local timber shop prepared these to the correct sizes on their planing machine.
Resin and Glue:
I used SP systems epoxy resin throughout the construction and was very satisfied with the results.

This is a typical 1Kg pack of SP resin. Mix ratio is 5:1, the largest portion being resin. Be absolutely accurate and use a syringe to measure the ratio, too little or too much will affect the hardening speed. (Too much caused a paper cup to smoulder!) I used a fast hardener with a working time of about 10 to 15 minutes and mixed no more than about 30ml at a time when taping.
Make special note of these Health and Safety Warnings!
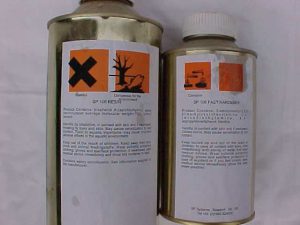
Always wear disposable protective gloves when handling these materials, hardener on bare skin can cause an allergic reaction which, once started will always return, future use of resin is almost impossible.
You have been warned!
Now everything was ready to make the kayak. I found it useful to carefully go through all the drawings and read the instructions before starting.
Now to the Building!